Monday, 6 June 2016

Salad Season is "a'startin'"

Hi All:

I know I am so behind in posting blogs, but my impending graduation and trip abroad are keeping me very busy!
I still have to eat healthy though, especially since I will be traipsing all over the English countryside. I've got to keep my energy up!

Here is the healthy salad I just had for lunch.  Those of you who read my posts regularly, know I love my blackened chicken, and this salad does not disappoint. (See my blog post of July 7, 2013 titled Summer Salad for the blackened chicken rub recipe)


It is fast and simple and I simply tossed everything onto the plate. In order, I used:

A handful of mixed greens (I used mixed baby spinach and baby kale)
A handful of coleslaw mix (mine had 2 different cabbages)
3 strips of blackened chicken left over from last night's dinner
A handful of toasted pumpkin seeds
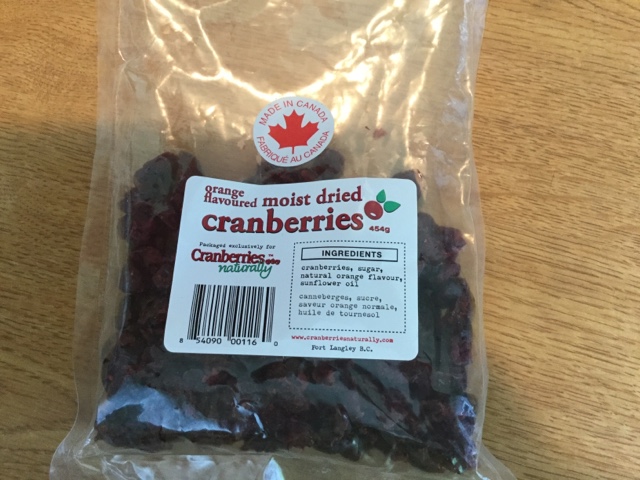
A handful of orange flavoured dried cranberries (locally grown)
A few crumbles of feta cheese
My own secret Japanese style salad dressing (it packs a flavourful punch, but any light dressing will do)
( I may reveal this super secret recipe in a later post; but only if Newman's Own turns me down first)

Et voila!  Enjoy.

Rosie


Saturday, 7 May 2016

My Next Artistic Endeavour

Hi All:


I know it has been such a long time since I posted last; is anyone still out there? But I have finally finished my schooling and will graduate with a Diploma in Music Performance in June. It has been a loooonnnggg 6 years going to school part time, but I finally did it! I finished all my music classes and am looking forward to have evenings and weekends free of  reading, studying, homework, projects and practicing.  I will finally have my life back. With more time on my hands, of course I am on to my next creative project:  does my list ever get shorter?

Since it is Mother's Day tomorrow, I wanted to give my Mom something special.  A few months back, my husband and son cut down our dead Magnolia tree. It was a very sad day, as it was a very beautiful tree when it was alive. It had lovely white blossoms and smelled heavenly; a little like Noxzema skin cream - if anyone remembers that! Well, not being one to throw anything away, I implored my husband to keep the branches and trunk. I have seen many coasters, candle holders and trivets made from wood, so I thought I could fashion some myself.  I had my husband cut some small wood slices which I could then make into coasters.  This has been percolating in my mind for some time, so for Christmas, I asked for a wood burning kit (from Canadian Tire) so I could decorate the wood slices and I have now just gotten down to making my first coasters for Mother's Day. My mom's name starts with E, so I set about looking for fancy examples of that letter.

Here are some examples of what I found:


I then drew various "E's" onto the wood with pencil and used the wood burning tool to burn in the design.  The kit comes with various tips, but I used the large slanted one for everything, and it worked fine.


I also worked on a cookie sheet, to save my table from accidentally being burned.  It worked well.


Here are the letters I used.  My first attempt is the E on the left and they progress to the final E on the right.  Note that I added a small ladybug to the one on the right as good luck. I am not sure that you can tell what it is though.


Now, to lightly sand and shellac the coasters and they will be done.  It really didn't take very long to make these.  It was fun and is surprisingly easy.   Just make sure to watch (and not touch) the hot tip of the tool and be very careful when setting it down.  Mine came with a stand to hold the tool when not in use.

Have fun and Happy Mother's Day.

Rosie


Wednesday, 25 November 2015

My life in a nutshell!!

Hi all:


This is my life in a nutshell!!  This really happened today:

I had a fortune cookie left over from Chinese take out, sitting on my counter.  I was about to throw it out but decided to open it to read the wise fortune that I was convinced, was coming my way.
I had to laugh.  This basically sums up my life.  I wonder who was asleep on his shift at the fortune cookie factory, because my cookie HAS NO FORTUNE IN IT!!!
That pretty much says it all!

Does anyone have a wise fortune saying, they can share with me?😉

Rosie


Sunday, 4 October 2015

One Pan Breakfast Brunch


Hi all:

It is Sunday today and I was craving an egg and toast breakfast but wanted something fast and easy that had extra flavour. Enter this recipe I made up on the fly this morning.  It has crispy toast, eggs and sautéed vegetable goodness and is very tasty.  It uses up any leftovers you have and best of all, once in the oven, you don't have to fuss and time the finished eggs with the toast etc.  Here it is:

One Pan Breakfast Brunch
**********************************
6-7 pieces of bread ( I used 3 slices of thick Texas toast and 4-5 slices of French bread)
1/2 red onion - diced
1 red pepper - diced
Mushrooms - diced (about 1cup)
9 eggs
3 handfuls of  organic mixed greens for salad ( I used mixed baby kale, baby spinach and red and green Swiss chard)
Approx. 2 cups of frozen hashbrowns
Salt and pepper
Olive oil

Preheat oven to 350 degrees. Spray a rectangular casserole dish (9x13) with olive oil. In a cast iron skillet, add some olive oil and sauté the red onions until brown.


Meanwhile, dice the bread into bite size cubes. Larger cubes will stay crispy in the oven.


Add the diced red pepper to the onions and brown.  Next, add the diced mushrooms.


Next, add about 3 handfuls of the organic salad greens. They will wilt down quite a bit but provide a lot of vitamins and nutrients.


Add the salt and pepper at this point.

In the casserole dish, layer the Frozen hashbrowns, the vegetable mixture and the cubed bread on top. ( I put the bread cubes on the bottom, but I think they would be better and crispier on the top).


Beat the eggs really well and pour them over the entire mixture of bread and vegetables.  It is Ok to leave some bread cubes exposed and not coated as they will get crispy like toast, in the oven.


Bake in the oven for about 25-30 minutes, or until eggs are cooked through.


I hope you enjoy this Sunday Brunch.


Yum!

Rosie


Friday, 18 September 2015

Egg-less Chocolate Zucchini Cake


Hi all:  I needed to use up the huge zucchini I grew this year in my garden and what better way than to make chocolate zucchini cake.  I got this recipe from my good friend Andrea, who is a dietitian, so I know this is the healthiest version you can find.  Her recipe originally called for 2 eggs, but I didn't have any, so I had to improvise.  I opened up my fridge and saw yogourt, so I decided to try it.  Well, let me say, the cake turned out really good and the texture was very light and moist.  I think I may use yogourt from now on.

Here is Andrea's original recipe, to which I have made some alterations.

Chocolate Zucchini Cake
:::::::::::::::::::::::::::::::::::::::
1/4 c. Butter (I used Vegan Becel margarine - we have to avoid lactose in this house; check your labels.... You will be surprised to find lactose/whey in your regular margarines)
1 + 3/4 c. Sugar
2 eggs (I used about 1/2 c.  Liberte  vanilla Greek yogourt instead. I think the high protein content in Greek yogourt makes this work.)
2  + 1/2 c. Flour
1 tsp. baking powder
1 tsp. baking soda
1 tsp. salt
1 tsp. vanilla extract
4 Tablespoons cocoa powder
1/2 c. Oil (I used canola oil)
1/2 c. Sour milk (use regular milk and add approx. 1 Tablespoon vinegar)
2 c. Shredded zucchini (washed; leave peel on)
1/2 c. Chocolate chips
1/2 c. Nuts (I did not use nuts)

Preheat oven to 350 degrees. Grease and flour, 2 small loaf pans. Beat together the butter (margarine), sugar and eggs(yogourt).  Add cocoa, oil, sour milk and vanilla and beat until mixed.  Measure dry ingredients in a separate bowl, mix together and then beat into wet ingredients slowly.(I usually add dry ingredients in 3 batches).  Add zucchini and chocolate chips (and nuts, if using).  Fold these into the batter.  Bake for approx. 50-60 minutes or until cake testrer (bamboo skewer) comes out clean.  My oven actually only took about 47-48 minutes to bake, so watch your loaves carefully.
Enjoy with a cup of coffee; decadent indulgence!  Did I mention this is healthy for you? I am sure it counts for daily servings of vegetables.


Enjoy!

Rosie

Saturday, 15 August 2015

Carrot Soup

Hi all:  here is another winner from my cookbook "Crap, What am I Going to Make for Dinner?"

,,

I tried to do a fancy design with cream here, but clearly I am NOT a talented barista. Don't laugh!!!(You know those pretty designs they add to the foam on lattes).  I should practice this technique more!!  This may not be pretty, but the taste is very "Michelin star" worthy!!

Anyhow, here is the recipe I developed many years ago but this time I made it super easy.  I wanted to get rid of all the old carrots in my fridge and hate wasting them, so I thought I might make a pot of carrot soup.  Trust me, this is a winner!!


Don't throw away those old, dry baby carrots.  Simply rinse them and put them in a soup.  It is delicious and healthy.

Carrot Soup
###########

Approx. 4 cups baby carrots (they are already peeled and I didn't even dice them. Use them whole)
1 small red onion - diced
4-5 sachets of OXO chicken bouillon 
2 Bay leaves
Olive oil - 1-2 Tablespoon
Basil - 2-3 Teaspoons (this is the key flavour)
Onion powder - 3-4 pinches
Garlic powder - 3-4 pinches
Salt and Pepper
Cream or milk (optional)

In a large Dutch oven, add some olive oil (approx.1-2 Tablespoons) and brown the onions until golden.


I

Add the bagged baby carrots (rinsed and whole) to the onions. If using large whole carrots, peel and chop them to bite size pieces.


Add 4-5 sachets of chicken bouillon to 4-5 cups of hot water and dissolve. Add the broth to the onions and carrots. Add the basil, bay leaves, salt and pepper, a few pinches of onion and garlic powder to the broth.  Cover and let the broth come to a boil, then reduce to simmer and let the carrots cook until very soft (about 35-50 minutes).  Once the carrots are very soft, remove from heat.


Remove the Bay leaves and blend the broth and carrots with an immersion blender. I placed the Dutch oven in my sink, to avoid splashing all over the entire kitchen.


At this point, you can add a few splashes of milk or cream to make the soup creamier, but you can see that this is really very thick already.  Add some more salt to taste, as I find that this soup does need salt.

As a final garnish, add a splash of milk or cream to the top of the soup bowl before serving, to add a decorative and creamy taste.  As I said, I need to practice this.


Homemade soups are a staple in my house, all year long. I don't get this "new" fad that is showing up in the media, about being green and using up leftovers for meals.  I have been doing that for decades now.  It's called "cooking"!!!  Any fine cook worth their salt, uses up what is leftover from previous meals.  It ain't rocket science.

You will love this soup.  It is indeed a winner.

Enjoy.

Rosie


Thursday, 13 August 2015

Beef Pot Pie


Hi all:

This is another recipe from my best-selling cookbook, "Crap, What Am I Going to Make For Dinner?"


Let me clarify "best-selling"; by best-selling I mean, it has been the best selling cookbook "I" have ever written. Yes, I have only written this one cookbook, but I have sold a whopping 4 or 5 copies, so it really is the best-selling book "I" have ever written. (My novel, on the other hand, is still in the editing stage, so I can't really say it is a best-seller yet.)

I had a real craving for pot pie yesterday and bought enough ingredients to make 3 of them. I gave two away to my sister, who is in need of some support on the Homefront right now, and kept the other for dinner.  Boy, am I glad I did!  I forgot just how good these are. I developed this recipe many years ago and have made it with both beef and chicken.  Both are equally good.  I urge you to try one.


Doesn't it look delish?

Here is the recipe, right out of the pages of my best-selling cookbook.


I did also use 2 other ingredients which were somehow left out of this recipe; garlic powder and onion powder, my two pantry staples.  You can't cook without them, as far as I am concerned. I also omitted the milk this time and it turned out fine.

This will make 1 very large pot pie or 2 smaller ones. I used frozen pie shells as I don't like fussing with making pastry dough.  They are usually very good and I just used the No-Name brand.


Here are also some extra tips and techniques I used for this recipe.

Brown the ground beef (or cubed chicken breast) in olive oil. Add salt, pepper, basil and the onion and garlic powders. Stir together and when browned, drain the fat and set the meat aside.

In a large Dutch oven, brown the red onions in olive oil. Once browned, add the diced carrots, celery, mushrooms, 2 Bay leaves and the beef (or chicken bullion). I used Oxo beef bouillon sachets. They give a nice, concentrated flavour to the broth.  I have tried the broth in cartons for this recipe, but these sachets really give a lot more flavour.  I simply dissolve each sachet in about 1 cup of hot water and then add the buillion to the vegetables. Let the vegetables simmer and soften for about 10-15 minutes, then strain the vegetables from the broth, using a mesh strainer over a large bowl.  Keep them separate until later.


This has 25% less sodium and still tasted fine.


Now to make the roux.  In the same Dutch oven, which is now empty of vegetables and broth, add about 3-4 Tablespoons of olive oil (or butter) and add in an equal amount of flour. Slowly incorporate the flour into the olive oil until a thick paste is formed. Cook over lower heat until the flour taste has been cooked off (3 -4 minutes or so). Once done, add the broth back into the flour roux very slowly, using a whisk to avoid lumps.  Keep whisking and slowly incorporate all the broth. Next, add the vegetables back into the broth.  Simmer for a few minutes, to thicken the broth.  I did add a little Veloutine to help thicken the broth.  Sometimes, it can be runny.


Now, just add the beef (or chicken) back in with the broth and vegetables, stir and fill your bottom pie shell with this mixture. I usually use a fork to pierce the bottom pie shell first, before I fill it. Next, remove the other pie shell from its foil pan (I usually remove it when it is slightly defrosted. If you wait until it is completely defrosted, the pastry will stick to the foil pie pan and will tear). Put the top pastry shell onto the pie base and pinch the edges to seal. Use a fork or knife to make small slits in the top pastry, to allow steam to escape. I also used strips of foil to cover the pie edges once pinched, so that they don't burn while baking. Place the pie on a foil lined baking sheet and bake for about 35 minutes or until golden.


That's it!! Trust me, you will love it.

Side note:   Did you notice that fancy bright orange bowl I was using? It is from a set of 4 "ZAK! Designs" bowls that I found here at Winners a few months ago. I know you can find them on Amazon, but I was lucky to find them elsewhere. They are melamine, are very versatile and come in festive confetti colours. I love them.  Here is 3 of them.  The other is AWOL.( somewhere buried in my fridge).


Enjoy the Pot Pie.

Rosie